I have been interested in history since I was a child and love to share my interest through my photography. Over the years, I have shot thousands of pictures of historical art and architecture at archaeological sites and in museum galleries around the world and uploaded them to Flickr for other history enthusiasts, teachers, and researchers to enjoy and use in their educational activities. If you would like to do the same, you may find some of the following tips helpful.
Photography in Museums and Galleries
Many museums allow photography of artwork in their permanent collections. However, few museums permit the use of flash or tripods/monopods with the exception of museums like the Victoria and Albert Museum in London or the Oriental Institute at the University of Chicago in Chicago, Illinois.
A museum’s photography policy is usually spelled out on their website in the ‘Planning your visit’ or ‘About’ sections. Even museums that allow photography, however, usually prohibit photography of objects included in special touring exhibits.
Some museums, like the Dallas Museum of Art, also prohibit photography of objects that are on loan from another institution so you must check the object’s identification information for a reference to its loan status.
My preparation for a museum visit begins with my selection of clothing. I always wear dark, nonreflective clothing – usually black.
This may sound silly but I learned this tip the hard way. I wore a red outfit on one of my first photoshoots and came home to find that all of my closeup images had a rosy glow. I had to remove the color cast in almost every closeup before I could upload the images to Flickr.
Avoid Unwanted Attention!
To avoid the attention of thieves and pickpockets, I carry my camera equipment in just an ordinary crocheted handbag that has pockets inside for my extra SD cards and batteries. I try to blend in with the other museum visitors so they are not reluctant to approach an item I am photographing. The curator of the Maryhill Museum of Art in Goldendale, Washington told me that she thought I had changed my mind about coming to the gallery on the day that she knew I was coming since we had never met face to face and she could not distinguish me from the other visitors strolling around the gallery.
A few words about museum etiquette – when working in the museum, try to be courteous to other visitors and don’t block the view of an object for more than a few seconds. If a tour group or a large number of visitors are clustered around a particular object, just select another object or even another room until the group moves on. At the “Treasures of Afghanistan” exhibit at the Asian Art Museum in San Francisco, I saw a man actually elbowing visitors out of his way so he could get up to a display case to photograph an object. He was not only quite rude but brazen as photography of the special exhibit was prohibited.
Coping With Low Light Environments
Most gallery lighting will require a camera that can be set to at least ISO 1600. In low light environments digital cameras will lower the shutter speed to increase exposure.
This can be a problem, though, when you cannot stabilize your camera with a tripod. Some cameras have built-in image stabilization. When I use one of these, I have found that I can hand hold with a shutter speed as low as 1/20th of a second. If the camera does not have built-in stabilization I rarely use a shutter speed lower than 1/60th of a second.
If you are taking pictures with your camera’s auto setting, you can check the shutter speed with the display option. If it falls too low, you will need to change to the shutter speed priority setting to set a minimum shutter speed. How low you set your shutter speed minimum varies from person to person, so practice at home first shooting objects in an entertainment center (without flash), for example.
Another technique to help stabilize the camera is to wrap your camera strap in a figure 8 around your arm just below the elbow and your wrist. If you’re still having trouble with camera shake, try shooting a series of shots in rapid succession using your camera’s burst mode.
Don’t Just Take Pictures – Take Notes
For images of objects to be useful, especially to teachers and researchers, it is important to capture proper identification information. I have a sequential method that works well for me. I shoot one or more pictures of a particular object then the last picture in the sequence is a picture of the identification information. This may entail checking the item’s reference number and finding it on a list of item descriptions. I center the object number and description in the frame of the image when photographing a section of a list so I can tell which description applies to the object.
Reflections on glass display cases are a common problem in museums. If you see a reflection obscuring the object on your LCD preview screen, try shifting a little to the right or left. If you can’t eliminate the reflection all together, try shifting enough to position the reflection to the side, top or bottom margins where it can be easily removed with your image editing software. Use your body to block the reflection if possible or recruit a companion to stand in a particular position to block the reflection. If you are alone, try asking another visitor to help you for just a minute. Most visitors are friendly and glad to accomodate you. Sometimes I have been able to work around a reflection by holding the camera up as high as I can then tipping it downward to capture the image. It not only eliminates the reflection in many cases but often produces an interesting angle of the target object.
If all else fails, move in close and zoom in on an interesting detail of the object. When I was photographing the spectacular armour collection at the Metropolitan Museum of Art in New York I not only had to deal with reflections on the glass display cases but reflections on the highly polished surfaces of the armour as well. So, I took close-ups of the intricate engraving on the helmets, gauntlets or other breastplate to supplement the sometimes imperfect full length photographs. The glossy surfaces of restored ancient red or black-figured Greek vases present a similar problem. I usually try to take the best angle I can with minimum glare for an overall shot then zoom in and take detailed close-ups of the mythological scenes normally portrayed on these vessels.
Composing Your Shot
 Fill your shot with each object as much as possible. Shoot vertically rather than horizontally. It is easier to fill the frame and often results in a more dynamic shot. Of the thousands of pictures I have taken, probably 80 percent are shot vertically.
Take detail photographs of various parts of larger objects. These images will not only be more visually appealing but more instructional.
When photographing sculptures of people look at their hair style, the fashion of their clothing, their footwear, their facial expression or the placement of their hands or feet. If they are holding something in their hands, take a close-up of it. I have learned that many sculptures, especially those who were unprofessionally removed from their archaeological context, must be dated by the figure’s hairstyle, pose or clothing so these items are of particular interest to instructors or researchers.
Think about juxtaposition. At the Getty Villa in Malibu, California a head of Alexander the Great is displayed in close proximity to a head of Hephaestion. I photographed each head individually then captured images at an angle so I could have both heads in the same shot to emphasize their special relationship.
A word about basic composition – although I have a lot of issues to think about when photographing art in a gallery setting, I try to remember a few basic rules of visual composition. Perhaps the most important is the Rule of Thirds. If you imagine a Tic-Tac-Toe grid imposed on your viewfinder, you would position key elements of your image at the points where the grid lines intersect. The digital photography school website has an excellent discussion of the Rule of Thirds. This rule of composition is so important many digital cameras have a display option to show such a grid on your viewfinder.
Since I photograph sculptures of people or deities and animals so much, I also try to remember another basic rule of composition. I notice which direction the figure is looking and try to allow a little extra margin on that side for the figure to “look into”. For example, if a figure is looking toward the right, I place the figure on the grid intersections on the left of the frame so the figure appears to be looking into the space I positioned on the right.
If you want to emphasize a particular aspect of a piece of art, place the portion of emphasis in the foreground. For example, if you want to convey a sense of power and strength in an image of a sculpture of Herakles leaning on his club, move around until the club is directly in the foreground then move in close, flex your knees slightly to lower the camera then aim your camera slightly upward toward his powerful face. If you want a viewer to contemplate his courage, move around to his left shoulder placing the head of his lion skin in the foreground, lower your camera then shoot towards his face.
Zoom in on the Detail
Also, don’t forget to photograph the small items. Many museum catalogs contain images of major pieces but seldom feature the small artifacts that provide context to a collection. Zoom in to capture the tiny details. Don’t forget to turn on your Macro mode. Steady your camera if necessary by carefully pressing your camera lens right up against the glass of the display case.
The only time I was ever scolded for trying to brace myself to steady my camera was at the Capitolini Museum in Rome where I tried to brace myself against a door frame to capture an image of a very dark bronze 4th- 3rd century BCE bust of Lucius Junius Brutus.
Remember, though, when you are zoomed in, your camera will probably set your aperture to its widest setting (usually f/2.8). This means your depth of field, or distance that your image will be in focus, will be quite shallow, perhaps only a few inches depending on your zoom setting. Try to aim your point of focus at a point on the artifact slightly behind the surface closest to the camera. Your camera will normally apportion 1/3 of the focus area in front of the point of focus and 2/3 behind it. If you are photographing the face of a human or animal figure, focus on the eyes.
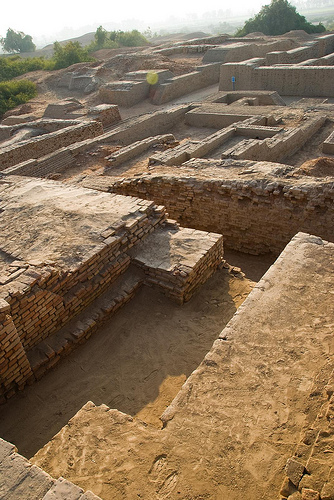
Coping With the Elements: On Site Photography
Outdoor photography poses its own issues. Bright sunlight can be as problematic as not enough light. A few months ago I visited Ostia Antica, the ancient port of Rome. It was a beautiful day but the sun was quite bright. I climbed up on the platform to view the famous black and white mosaics and saw that the surrounding trees cast very dark shadows on them while the bright sun made lighted portions brilliantly white. I knew my digital camera would have trouble trying to average such dramatic contrasts so I took an overall shot that I knew I would need to adjust in my image editing software then zoomed in on individual figures that were either in the shade of the trees or fully illuminated by the sun.
If you are close enough to a subject with annoying shadows, force your flash to fire even though its a sunny day and the camera has plenty of light to expose the image. Another tip for bright days – if your camera accepts screw-on filters, add a polarizing filter to help you achieve richer colours.
If you are trying to photograph a dark statue against a bright blue sky with puffy white clouds, expose for the sky not the statue. You can selectively lighten the statue later in your image editing software, but a “blown out” sky is difficult if not impossible to recover.
On gray, overcast days simply limit the amount of sky that you include in your shot since it will not add any detail to your composition. You can always add a little blue later with your image editing software.
Remember to keep your horizon straight and don’t place it in the exact center of the image. The general rule is to place the horizon about 1/3 down from the top of the image. But, if the sky is relatively empty and the foreground is more interesting, place the horizon about 1/8 of the way down from the top.
To add depth to my outdoor images, I like to use framing. I place interesting elements like an overhanging tree branch, cluster of column fragments or, in this case, a crocodile sculpture at Hadrian’s Villa, in the foreground.
If you have an interesting foreground, squat or get down on your knees to be as close to the ground as possible to lower your point of view, then shoot slightly upward. I have even lain on the ground on my stomach to get the perspective I wanted. Be sure your aperture is set to the highest number to get the maximum depth of field, though.
Don’t forget to shoot closeups of the little details you discover as you explore a site or an anteroom to a gallery. Photograph that little impression of a goddess in the remains of a plastered ceiling.
When my English photographer friend, Richard White, is with me on a photoshoot, we often make a game out of finding and photographing the most interesting details at a historical site.
Sharing Your Images on the Web
Although there are a number of image sharing sites on the web, I have found Flickr to be the most intuitive to use and the most visited by others searching for images.
Although Flickr offers free accounts, I pay the nominal $24.95 per year for unlimited uploads and storage. You can read about the differences between free and Pro accounts here. To help me manage my images and easily upload them, I downloaded and installed the Flickr desktop uploadr
Before I upload my images to Flickr, I open each image in my image editing software and remove as much noise as possible. Then I check the image for reflections and other museum visitor body parts or distracting backgrounds and remove them if I can.
If the image has obvious horizons or vertical columns, I straighten them if necessary. I increase the contrast slightly to bring out the colour of frescoes or mosaics and add just a touch of sharpening.
After completing all of my adjustments, I save the file then rename the file to the title I want to appear in Flickr. If I have several images of a particular object, I adjust and rename each one then select all of the renamed files in my file browser, right-click and select “Send to Flickr” from the popup menu.
I allow Flickr to resize the images to a maximum dimension of 1600 pixels then type the tags I wish to use with the images into the appropriate dialog box.
I tag each image with not only its subject, but synonyms and related historical persons or references, a reference to the culture that produced it, the museum where it is located, the city and country of the museum where it is located, the type of material from which it is made, its color, the time period in which it was made such as 3rd century CE (I prefer to use the religion-neutral format since Flickr is a global resource), my Flickr username, any special group tags like Heritage Key, the relevant Heritage Key page ID, and, if I want a link to the image to appear in Twitter, the word snaptweet.
I have an account on Snaptweet.com that relays a link to any image I post to Flickr to my Twitter account. I also have my Twitter account linked to my Facebook account so the image post to Twitter will update my Facebook status too. Then I select a set I have created to contain images from that particular museum or place and click Upload.
When I have finished uploading a batch of images, I login to my Flickr account and click on the “Organize” link to add the image to various subject groups to which I belong as a way to publicize the image to other interested people.
Finally, I add “Photographed at [the museum name]” with a link to the website of the museum in each picture’s description to encourage viewers to visit the museum’s website and perhaps plan a trip of their own!
If you’ve got any heritage photography tips to add, please use the comments box below. And remember to add your ancient world photographs and video to the Heritage Key Flickr pool.