 Want to know how to mummify a body but don’t know where to start?Well, you’ve come to the right place.
Following on from our video featuring Dr Zahi Hawass, in which he gives Heritage Key a fascinating insight into how mummies are made (see the video embedded below), and an enlightening interview with Bob ‘Mr Mummy’ Briers on mummification, we’ve condensed millenia of wisdom into 7 not-so-easy and certainly not pleasant steps.
Egyptian embalmers were masters of their craft, and while we possess a lot of clues about the long and laborious procedure they went through in order to ensure the deceaseds safe transit into the afterlife, much also remains unknown about how, exactly, they managed to wrap corpses so well that they have managed to survive for millennia.
Only one mummification using Egyptian techniques has been carried out in 2,000 years in 1994 by Egyptologist Bob Brier. Its a process so tricky Brier recently told us hed prefer to never go through it again.
Video: Mummification Featuring Dr Zahi Hawass
As Hawass points out, Its very important to talk about mummification. To explain what happened really. So weve decided to give you a rough guide with Dr Zahis help to how to make a mummy in seven frankly gruesome steps. Definitely dont try this at home kids its not for the faint of heart.
Step 1: Purify
Your dead Egyptian pharaoh or queen or priest or musician or highly-thought-of pet has just been laid down in front of you ready for embalming. Mess this up, and you may be headed for the afterlife soon yourself slowly and gruesomely. So where to start?
Purification of the corpse is the crucial first step. The body needs meticulously washed with spices and with special wine made from dates, then rinsed using water from the Nile. Next, an incision should be made down the cadavers front, and his liver, lungs and intestines removed. Everything inside his stomach, Hawass explains.
Dont throw the bits away though youll need them later. Nothing gets wasted every last trace of the deceaseds remains must be sent onwards to the next world.
Step 2: Dehydrate
Next up: the all important dehydration of the corpse. Natron a naturally occurring mixture of sodium carbonate decahydrate found in dry lake beds in ancient Egypt is the crucial substance needed here, and lots of it. The body needs to be stuffed with piles of the little white, salt-like crystals, then buried in the stuff too. It acts as a drying agent that will eventually turn the flesh hard and leathery.
Not a drop of moisture should be allowed to escape while this is all happening the body needs to be placed on a slanted surface, so that any liquid that drips off can be collected beneath. Any rags used to mop up should also be kept theyll need to be buried with the corpse too.
How long should the corpse be left to dry for? This is something experts cant be certain of. Brier, in his modern-mummification, elected for 35 days, but the optimum period may be closer to 40 days, or vary from body to body.
Step 3: Treat the Organs
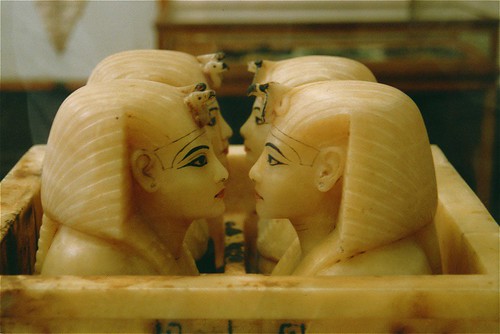
Its time to deal with the liver, lungs, intestines and other contents of the stomacht. As Hawass reveals in the video, each one of the individual internal organs, (the Egyptians) put on natron to dry, then they covered with linen. They would then place the organ in a wooden or stone Canopic chest or jar, and set it aside for burial with the body (in later burials, they would stuff the dried, wrapped organs back inside the body).
They would leave the heart, says Zahi, because the heart is a place of knowledge. It gives knowledge that they need in the afterlife. The brain has to go though. If you leave the brain inside the mummy, the brain can be damaged, Hawass points out. Insert a long hook into the nasal cavities and mash the brain into a pulp, before pulling it out piece by piece back through the nose. We warned you this isnt for the faint of heart!
Step 4: Cleanse
After the dehydration period has passed, its time for more cleansing inside and out. Wine made from dates should be used again, and also oils and spices. This prevents the skin now all dry and shrunken from turning too hard and shriveled.
Step 5: Restore
The fifth step is all about returning the corpse to as life-like a state as possible. With much of its interior removed, its necessary to stuff the body to fill the deceased out again, using sawdust and leaves.
The cadaver then has to be sealed. They closed everything open in the body of the deceased, Dr Zahi explains, like the nose, and areas inside here, he adds, pointing at the nether regions. The mouth, in some cases, can later be reopened in a ritual to symbolise breathing or eating (a practice that has given rise to all kinds of legends about revived mummies).
You might opt to add some jewellery at this stage necklaces, rings and bracelets made from gold and precious stones before the wrapping begins.
Step 6: Wrap
Giving your mummy that iconic bandaged look is perhaps the most delicate and time consuming part of the process it can take up to a week to wrap the body. First cover it with shrouds, then use long, thin strips of linen, starting with the head and neck, moving onto the fingers and toes, then separately the arms and legs.
The arms and legs next need bound together, and a spell from the Book of the Dead placed in the palms of the hands (to give the deceased some useful tips on how to pass through obstacles in the afterlife). More and more strips of bandage then need to be added and glued together at every layer using special resin. Amulets and other lucky charms can be placed in between layers, and you might also want a priest on hand to read out spells anything to give the Ka (the mummys spirit) the best possible luck on its impending journey.
Finally, youll have to wrap a sheet around the whole body, painted with an image of the god Osiris deity of the afterlife. Hes the boss from here on in.
Step 7: Last Rites
Your corpse is now officially mummified theres just a few formalities to attend to. Theres always a danger that the spirit might not recognise the corpse in the next world, so to prevent the two from becoming estranged, place a portrait mask over the deceaseds face before burial first in a series of wooden caskets, then inside a large, ornate stone sarcophagus.
Before the tomb is sealed, grave goods need to be dropped off furniture, food, drink, clothes, valuables. Even shabti slaves armies of miniature skivvies, intended to serve the deceased should they be called upon to perform manual labour in the afterlife. No eventuality on the deceaseds journey to the land of the dead should be left unconsidered. Because, as Dr Hawass signs-off, this time in the tomb is for eternal life.
That’s it. Of course, it’s not only human bodies that can be mummified. You can apply the same process to any animal – as seen in this video featuring Salima Ikram of the Cairo Museum.
VIDEO: Making an Animal Mummy, Featuring Dr. Salima Ikram


